Wednesday, 31 October 2018

Character profile

Name: Maliha Cuevas
19 yrs, female
Goes to university & wears smart clothing. Her signature look outside of uni includes fancy tops.
Stays at home and takes the train to uni, Maliha loves her neighbourhood and friends around her, however, she comes from a troubled background and her family are tough to deal with.
An extroverted, passionate individual who is passionate about travelling, her room full with a map across a wall with top countries to see & a Polaroid wall full of places visited.
Originally from Croatia but lives in London.

Name: Abby Fellows.
19yrs, female
Abby is shy and quiet, though also smart.
Has a job in the fashion industry but works in the background.
Stays in besides work - introverted.
Wears stylish clothing & has confidence when it comes to art and fashion. She believes and always portrays the idea that emotions are expressed through clothing.
Close link between her personal and work life.

Maliha and Abby's friendship blossomed throughout the 5 years of secondary school and they've been best friends since. Maliha is ambitious but has a troubled home life. Her parents constantly unhappy with her and older sibling never believing in her or supporting her. The idea of travelling distracts her, along with constantly being with her friends - especially Abby.
Abby is opposite to Maliha in terms of being extroverted. Though she likes the idea of exploring and travelling, she does not have the confidence.
An adventure film - the whole story includes the culture of places and beauty of the world. The theme of friendship and going outside comfort zones is explored.

Maliha's parents stand in the way of what she wants, Abby's confidence stands in the way of what she could experience.
There's a local ( cinematic ) street down the road from Maliha, with steps to sit on outside a neon light art gallery towards the end of the street. She had just gotten into an argument with her boyfriend and parents, and usually likes to go here in times of distress. Abby comes by and they both have a conversation.
( Abby last speaks to her on this friday evening and does not see her after. Her parents are worried searching for her, but nothing to be found. Abby explains how Maliha spoke about travelling and where to first. They used the map in her room for clues. Abby goes out to the first place. She goes to find her, because shes her best friend. On the way she faces challenges outside her comfort zone, learns about new cultures and explores the beauty of the world. )

https://writerduet.com/script/#GSZNN


First script

A script / screenplay is essential as part of film making and is produced by the screenwriter. Scripts are used by actors - including dialogue and actions and producers - directions / actions again.
An important aspect of scripts includes the fact that one page of script is roughly one minute of screenplay on camera. Scripts have:
  • Slug-lines which tell you if the scene is in our outside, the time of the scene and the location.
  • Action which tells the audience whats happening.
  • Characters and Dialogue. 
Script for a male and female character looking for their missing friend -

Monday, 29 October 2018

Tracking shot practical

Travelling / Steadicam shot / one take  - Includes no editing, camera follows characters along in a scene. This type of cinematography makes the audience feel more connected by following the action and not distracting or disturbing anything with evident editing.
To experiment this, our group took a continuous shot of people running from someone scary. What went well was the transition from the first character to the rest however the steadiness of the actual camera could be improved along with adding in any other ideas such panning down to the grass and up again as part of a ' cut ' also allowing the actors in the scene to change positions. This includes a technique learnt and demonstrated in Birdman-
Bird-man- 
 https://youtu.be/YontML1YuMQ
An example of a film which successfully demonstrates a Steadicam shot is Bird man. Though it includes some cuts, they are subtle and make a scene look as though it has been filmed all at once. For example, cutting during pan shots. The camera has a few seconds to pan to something irrelevant or unnoticeable to keep the audience distracted whilst using a cut.
Some ways in which the camera has been placed means there's a natural wipe cut. - an object in the shot goes across the top and bottom of the frame allowing it to 'wipe' across.                                                                                                                                                               


Scary film editing

As part of initially learning how to use Premiere Pro, I have edited together clips given of a scary film. I have learnt other ways of cutting videos e.g by using the mark in and mark out symbols and selecting to choose the video only or audio only along with experimenting with ways to start or show a video. For example, going to effects and using anything under video effects, adjust and blur / sharpen which suits the clip aesthetically.

As an improvement further on, I have added audio, this being something I could not do at the beginning of the year, along with sound and visual effects experimenting with things such as Constant gain/power and eyedropper filler. To improve the clip could be edited in longer duration.

Friday, 19 October 2018

High key photography - photography studio

High key photography -
High key - bright, not many shadows, white backdrop
Low key - dark, more shadows, black backdrop. 

High key photography is used mostly within fashion photography and portraiture photography.
The purpose of this photography is to create a solid white background and focus on the foreground, also known as infinity lighting, along with creating an overall natural setting.
  • 4-5 lights are used with this setup - 2 are focused on the backdrop itself and do not go on the model. These lights can be adjusted between the settings of 4-6. Do not let these interfere with the model.
  • To stop the lights from interfering and differ from the model, place poly-boards facing away from the two lights. Place these at roughly a 45 degree angle and make sure the model is not too close to the backdrop itself. 
  • More light can be projected onto the model, this can be done by using a backlight.
  • The backlight is a higher light which further separates the model from the backdrop. In any studio setups for high key photography, this light would bring the subject forward & prominent from the backdrop.  
 Vivider's-
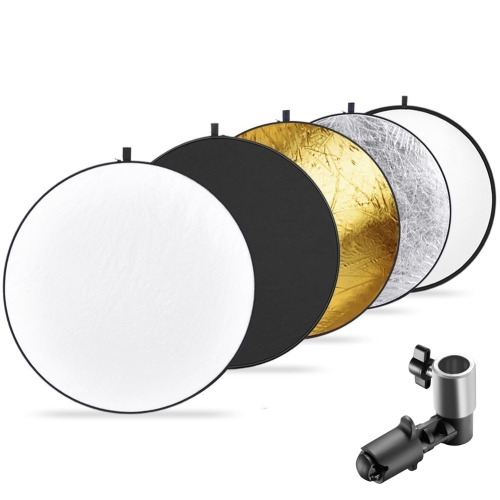
Silver - contrasts
Gold - radiates a warm glow & overall gives a warmer tone. used mostly in vivid mode on a Nikon.
White - a natural reflection onto the model / subject & colour neutral light. use if the brightness onto a models face is desired to be higher.
Image result for vivider photography

High key - bright, not many shadows, white backdrop
Low key - dark, more shadows, black backdrop. 


Image result for projection photographyProjection photography -
This type of photography can be abstract and involves a projector. The effect created depends on where the projector is placed and uses continuous lighting. 

Some info about pp - 
  • The closer the projector to the backdrop the smaller the image will be
  • Putting the projector on the floor allows it to project across the whole backdrop
Projection photography artists -
Mads perch -
bdf7d77c4556749a8661cfb17e4a2797.jpg                  Marthe Sobzak
projection marthe sobczak


Studio photography research

                                                        
Related imageFashion photography -
I would like to experiment with fashion photography in the studio as I hold an interest in the genre as a whole and would like to view the results shown using the high key light setup. This allows me to experiment with something different and develop my skills with high key, and is different to usually using natural light. 


Related image
Lighting Setup - 
The high key studio setup includes using two lights focused on the backdrop and other main lights for the model, this may be 1-2+. Other setups can be used such as the 3 main light. This can be adjusted by switching lights off on or and positioning them in the desired places, allowing various experimentation. A white/ plain background allows the fashion including any accessories or clothing to stand out.
Image result for gel light photography


Gel light photography-
This genre of photography consists of a mix of portrait and fashion photography and can be used to create moods. A mix of light and dark colours can create interesting contrasts, making the overall photo more aesthetic. Using these colours also allows a photo to be annotated and seen as more deep. Specific colours can indicate or tell different stories and have various messages. This gives a photograph depth as well as pleasing aesthetic qualities, making it an area of photography I aspire to experiment in.

Image result for gel light studio setupLighting Setup -           
Using different lighting settings will allow exploration of highlights and shadows.This could be mostly in portrait photography by adjusting which colours reflect where and why. For example, having a bright colour reflect on the higher parts of the face or on only half the face. I would like to learn and use this setup for future projects.


Related image
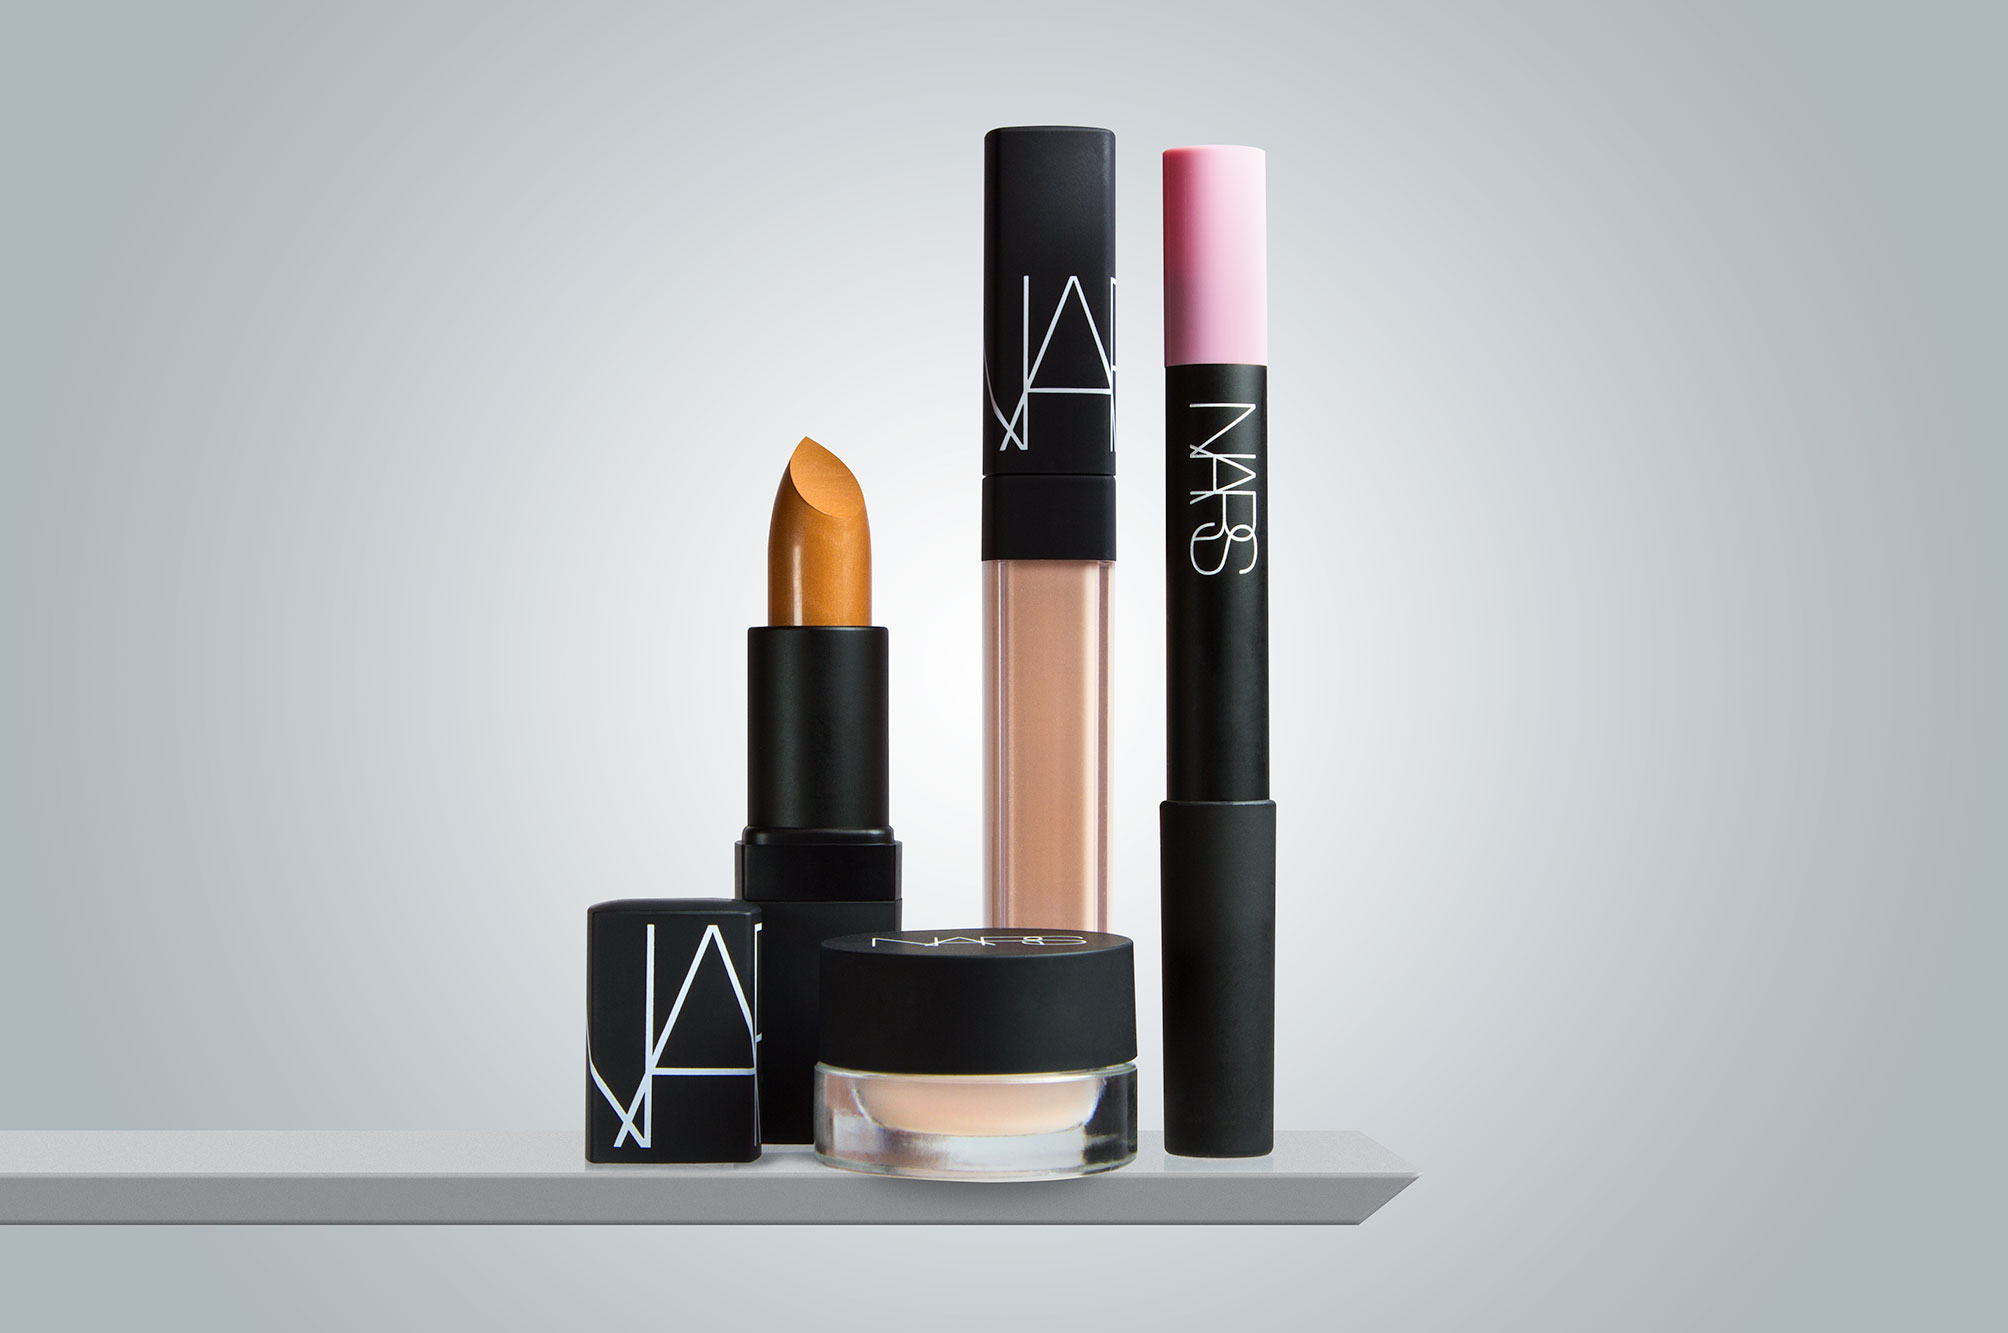
Product photography - 
Product photography includes taking photographs of a specific product. This could be for advertisement  and commercial purposes for any brand. I would like to experiment with focusing all importance around a product when photographing in the studio.


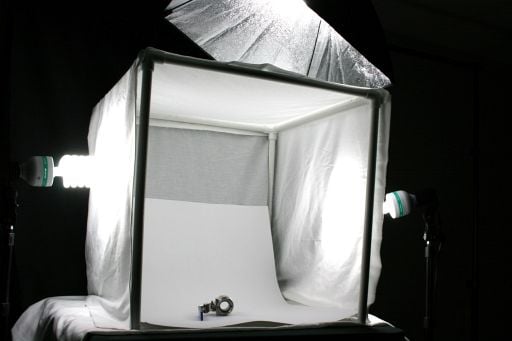
Image result for light box setup photography
Lighting setup - 
The setup includes using a light table and creating the infinity effect. The background of product photography must be plain white in order to allow the main product to stand out and attract viewers attention.This indicates that nothing in the frame / photograph is important and the only focus / main subject is the product itself.

Thursday, 18 October 2018

Photography terminology - technical and aesthetical qualities.

F stops - number  / Aperture - lens
F, 1.8, 2.8, 4, 5.6, 8, 11, 16, 32
1.8 to 8 - more light to through the lens, meaning a wider aperture.
The higher the number the less light, meaning a smaller aperture.
The F stop controls the amount of light that travels through the lens. Is there alot of light?
Includes natural light, studio light.

Shutter speeds
Fractions - ⅛, 1/15, 1/30, 1/60, 1/25, 1/250, 1/500
Shutter speeds control how fast or slow light travels through the lens.
Fast shutter speed - 1/25 to 1/500
When capturing movement, use a fast shutter speed.
Slow shutter speed - ⅛ to 1/30
When capturing blurriness, use a slow shutter speed.

Shallow depth of field - foreground in focus, background is out of focus depending on a certain number.
Depth of field - Controlling the aperture. Depth of field starts at 8.
1.8 to 8 - shallow depth of field
8 to 32 - depth of field
The f stop goes higher and the lens size decreases. This means light is only coming through in one direction,
creating depth of field.
A wider lens allows light to travel in every direction meaning a blurred, shallow depth of field.


F,    1.8, 2.8,   4, 5.6,  8,      11,      16 32
½    ⅛, ⅛    1/15 1/30   1/60   1/125   1/250 1/500


If changing the F stop without changing the shutter speed, the brightness will change. This is because
there is more light being let into the lens.
E.g, if allowing more light into the lens by changing from 8 to 5.6, the shutter speed must increase
to deal with and compensate the light.
The lower the F stop number, the higher the shutter speed fraction.


Modes on a Canon camera -
M - manual
A - aperture priority - control the aperture and shallow depth of field / depth of field.
S - shutter priority - controls both aperture and shutter speed.

Rule of thirds -
Rule of thirds includes using a grid template and making sure the main subject of the photo is within
the corner of any parts of the grid. It consists of two horizontal and two vertical lines. The point in which
the lines intersect show the most important subjects of the photograph or the whole actual subject, as shown
in this example.
Researching rule of thirds has allowed me to apply it naturally within my photography, and consider it
when filming to make shots look more cinematic. However, one thing I must improve when experimenting
with the technique includes making sure the subject is not too far off in the corner of a frame and
has some space between the edges.
My example:
web image


my photography

Horizon line -
The horizon line is a horizontal line in a photograph separating it into a top and bottom section. An
example is in landscape photography, the line may separate the sky at the top part of the image
and water below that. The horizon line can only be successful in examples of outdoor / nature
photography. Deciding where to place this line can massively affect a photograph.This is shown
when deciding which part of the photo is more interesting. For example, placing the line at a lower
part of the frame as the top part of the environment is more visually pleasing. Removing other
aspects from the frame allows you to focus.
Image result for horizon line photography


Composition -
The composition of a photo includes the way certain aspects are arranged within the frame.
This is important in photography as it involves making sure subjects are
shown in the way the photographer would like it. This could be for message and meaning reasons or
aesthetical reasons.
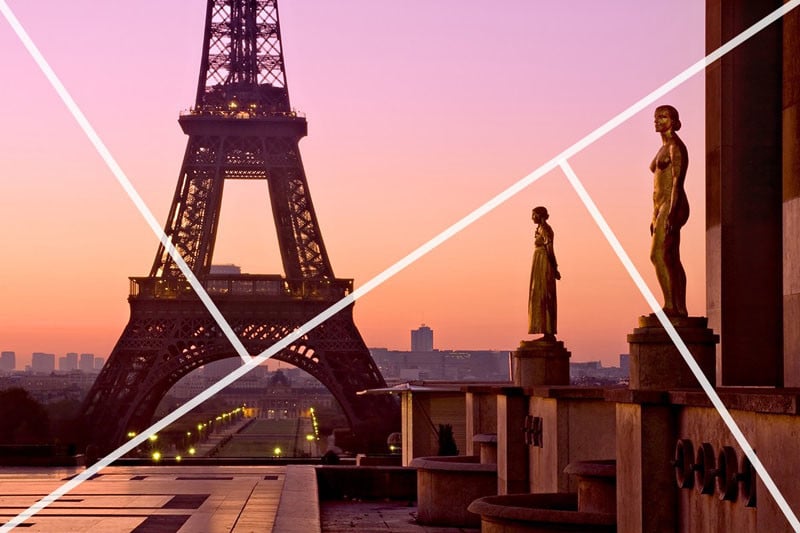
Image result for composition photography


Framing -
Framing includes the way in which subjects and objects in a photo are presented. Framing
can act as a border and make the main content of a photo stand out. The main idea of
framing is to set a focal point, allowing viewers to stay concentrated on one main subject.


Related image


Personal example of framing:
This photograph has been taken at an angle which allows the two branches to act as a frame over the main subject of the leaf, peaking through and filling the negative black space of the fence. Furthermore with this photography being part of nature / landscape photography, shallow depth of field has been used with the main branch blurred and the orange / autumnal leafed tree in the background to be blurred out with the foreground in focus, again showing the main subjects importance. 


Depth of field -
Depth of field is when both the back and foreground of a photograph are in focus. To create
this the F stop on a camera must be above 8. This technique is most likely most used when the
background and subject of the photo are as important as each other. As the F stop goes
higher, the lens size decreases allowing light through the lens in one direction only.
Image result for depth of field examples


^depth of field ^shallow depth of field


Shallow depth of field -
Shallow depth of field is when a photograph's background is out of focus and the foreground
in focus. This can be used to show the importance of something and to create this effect, the
cameras F stop number must be between 1.8 and 8. The F stop number is low, meaning a
wider lens allowing light to travel in every direction. This therefore creates blurred,
shallow depth of field.

University research